Home

Notificaciones y comandos con Telegram

morser

OpenSpa Team
Miembro del equipo
21 Mar 2007
7.207
1.307
0
57
MANUAL CONFIGURACIÓN NOTIFICACIONES CON TELEGRAM

A partir de la versión 7.1.002 tenemos disponibles notificaciones en telegram. Se ha hecho un API sencilla que no necesita muchas librerías y se ha añadido porque además de poder recibir notificaciones por este sistema, nos permite interactuar también con el decodificador por medio de unos sencillos comandos que luego veremos.

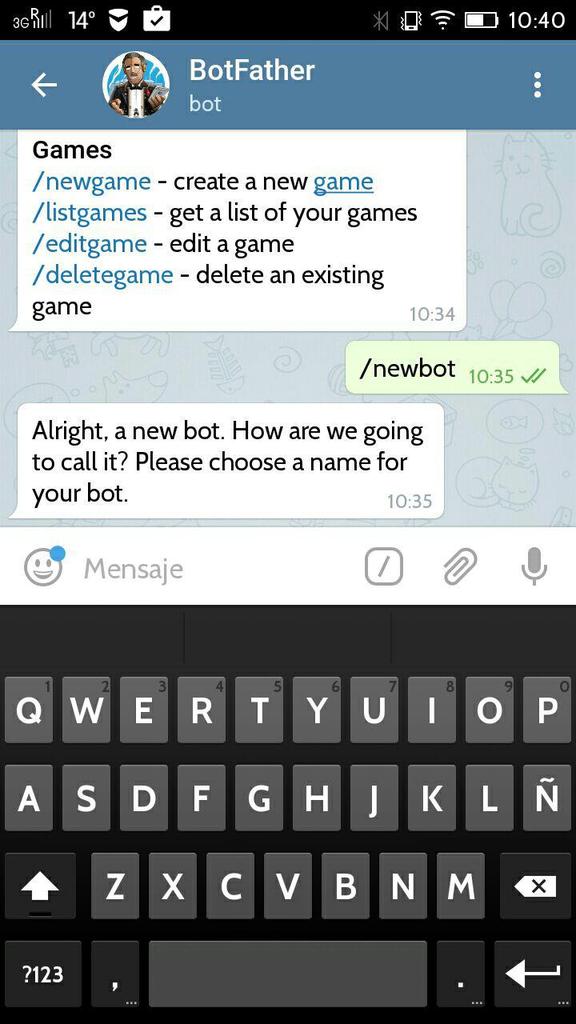
Para empezar, necesitamos generar nuestro bot de Telegram. Para ello, en el buscador de Telegram buscamos BotFather y accedemos a dicho bot.
Al entrar nos aparecerá una pantalla con los comandos disponibles. Para crear nuestro bot ponemos el comando /newbot

3-photo_2017-05-13_11-06-54_zpscbyetndb.jpg


Como veis, nos pide ahora que le digamos el nombre del bot. En este caso le hemos puesto de nombre Prueba openspa

4-photo_2017-05-13_11-07-14_zpskaiw7bx8.jpg


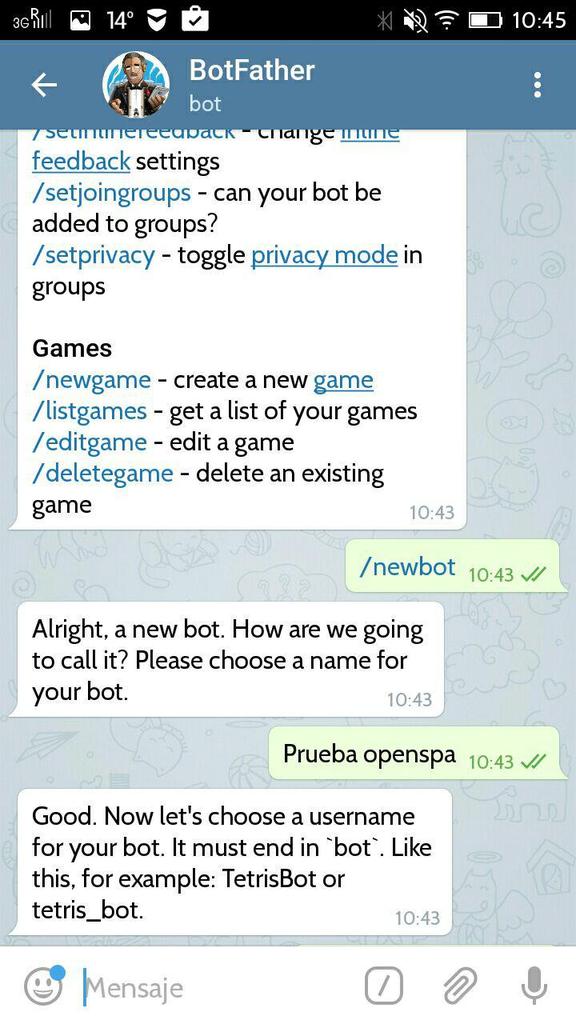
Y ahora nos está pidiendo el nombre de usuario de este bot, que debe de acabar imperativamente por bot, le hemos puesto en este ejemplo pruebaspabot

5-photo_2017-05-13_11-07-25_zpsblecdcjv.jpg


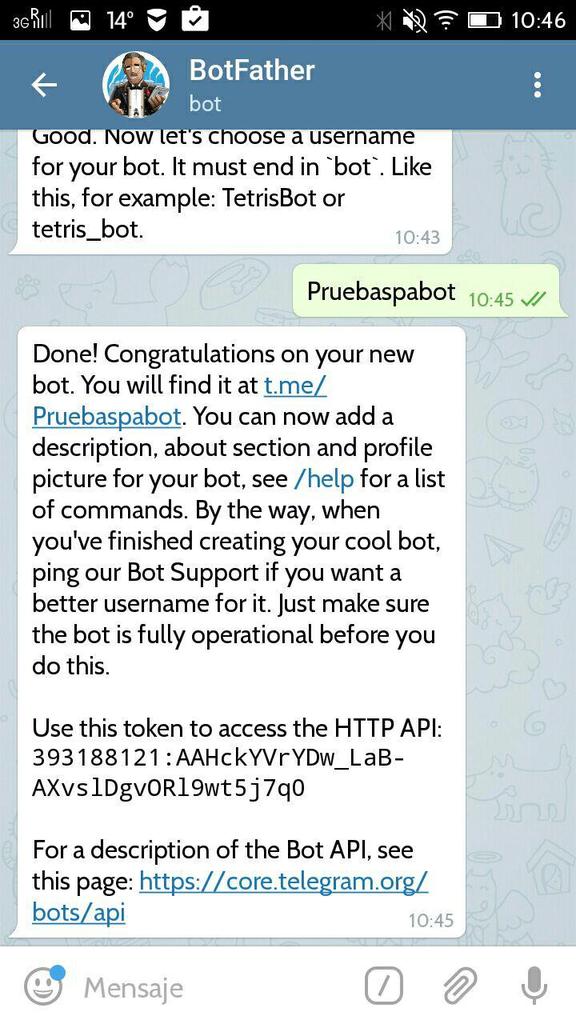
Como veis, nos indica que ya está creado y nos da un Token HTTP API. Este token lo debemos de apuntar para luego saber el chat_id y también para meterlo en la configuración en el decodificador. Como es muy largo, al igual que se hizo con pushetta, he habilitado la opción de que lo lea de un archivo, así que mi consejo es que lo copiéis y lo peguéis en un archivo de texto que solo contenga este token y lo guardéis con el nombre token (en minúsculas y sin extensión).

Si queréis, podéis añadirle una descripción al bot con el comando /setdescription o un icono con el comando /setuserpic. Al ponerlo, en la parte de abajo os saldrá la lista de bots que habéis creado para elegir al que queréis hacer los cambios, luego escogéis el archivo de imagen, el nuevo texto o lo que sea que estéis cambiando, pero esto ya no es necesario para lo que estamos haciendo.

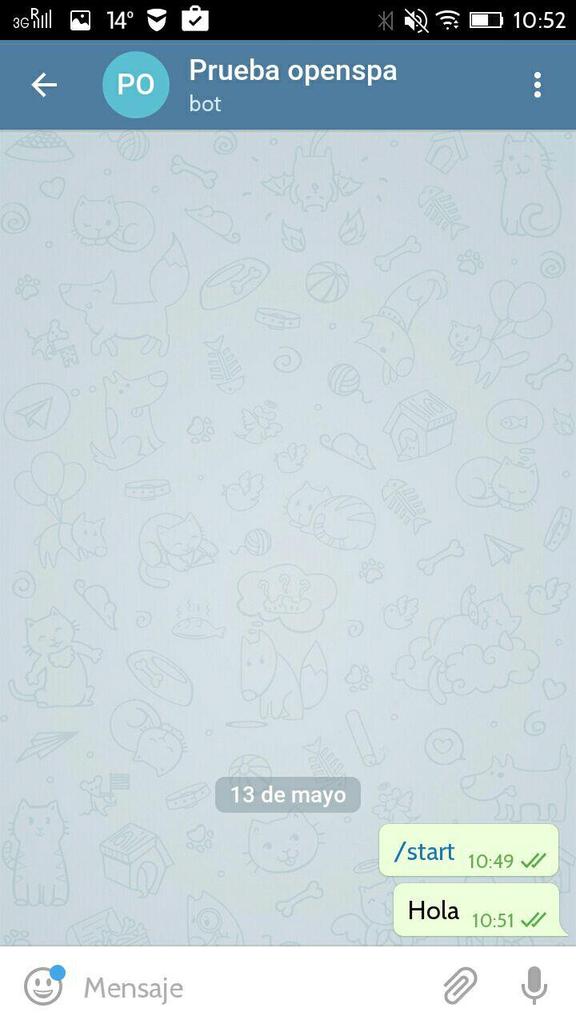
Para lo que estamos haciendo necesitamos todavía el chat_id. Para tenerlo, tenemos que usar el buscador de Telegram de nuevo y buscar nuestro bot poniendo el nombre de usuario del bot que hemos puesto, en este caso pruebaspabot. Entramos en él y enviamos cualquier mensaje

6-photo_2017-05-13_11-07-35_zps0bsartft.jpg

Ahora usamos un navegador de internet y nos vamos a la pagina https://api.telegram.org/bot[TUTOKEN]/getUpdates, sustituyendo [TUTOKEN] por el token que habéis puesto antes en el archivo token y os saldrá algo como esto

7-chatid_zpsqcflwcqh.jpg


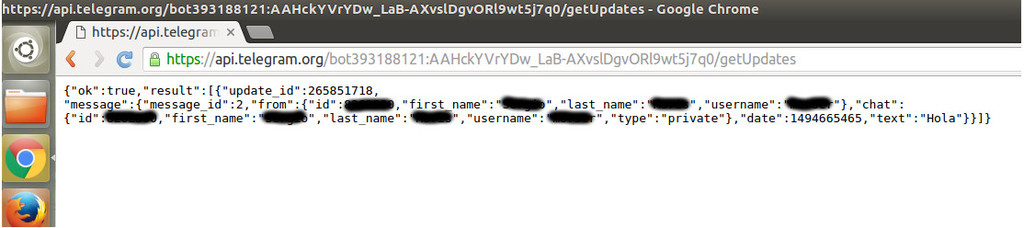
Si no os sale eso la primera vez, volved a enviar otro mensaje.

Se han eliminado datos por si acaso, lo que necesitáis es el campo llamado "id" que aquí lo veis tachado y que, como veis, sale dos veces (será el mismo número). Os apuntáis ese número que es el chat_id que te corresponde y deberéis ponerlo luego en la configuración del decodificador.

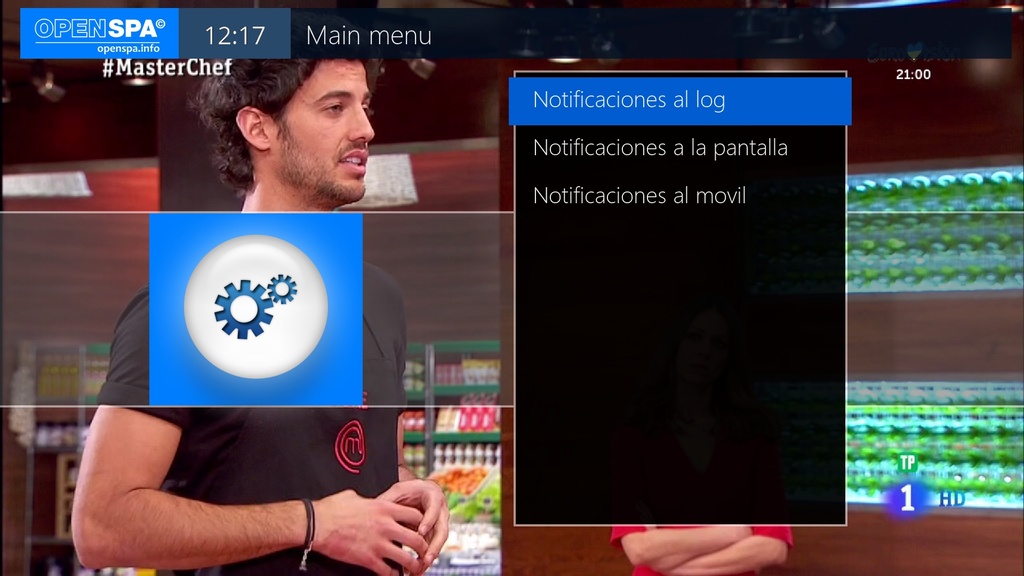
Bueno, pues ya lo tenemos creado, ahora solo nos falta configurarlo en el decodificador. Para empezar, metemos en la carpeta /usr/lib/enigma2/python/Plugins/Extensions/spaNotifications el archivo token que hemos creado antes y que tiene el token HTTP API del bot (solo es necesario meterlo la primera vez para que el plugin lo lea cuando está en blanco en la configuración). Luego, nos vamos a la configuración de notificaciones. En esta versión, ya que se estaban haciendo muy extensas las opciones de configuración, se ha dividido en 3 pantallas diferentes, así que al entrar en la configuración de notificaciones os saldrá un menú para elegir la configuración del log, la de las notificaciones en la pantalla y la de las notificaciones al móvil. Entraréis en esta última.

8-notifications1_zpsvgpa5dxg.jpg


9-notifications2_zpsxhwc2ghn.jpg


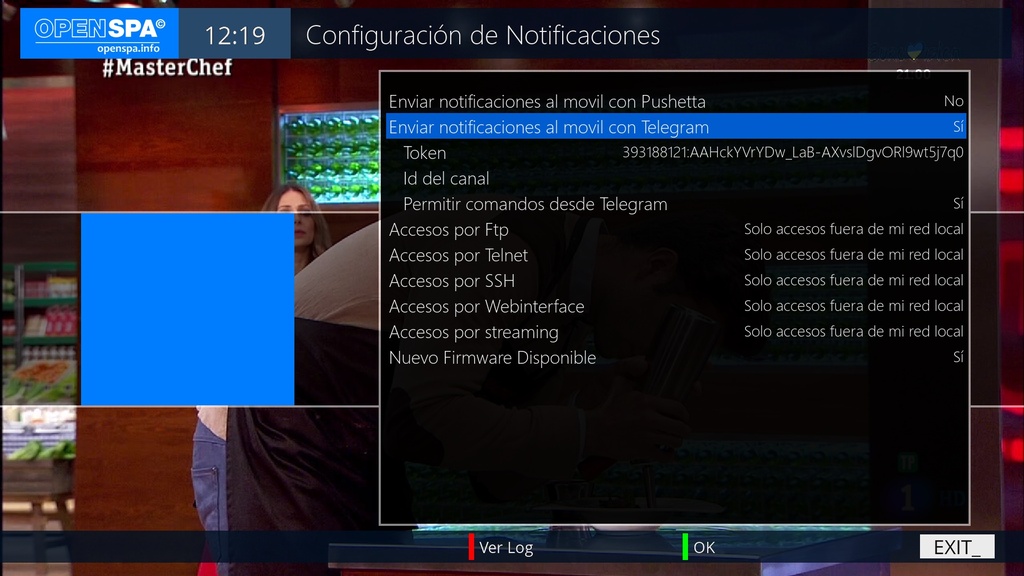
Y al poner en si la opción de Telegram, nos lee el token del archivo y nos lo pondrá en la configuración, asi que solo tendremos que poner el chat_id y configrar las opciones como queramos.

10-notifications3_zpssjx9fkon.jpg


A partir de aquí ya empezareis a recibir las notificaciones por Telegram, pero como os he comentado al principio, además de recibir las notificaciones, podeís enviarle al decodificador una serie de comandos. Los comandos disponibles son los siguientes:

/info - Nos devuelve el modelo de decodificador, versión de la imagen y versión del kernel
/status - Nos indica si el decodificador esta encendido o apagado
/camd status - Nos indica si la camd esta trabajando o no
/camd restart - Nos reinicia la camd
/screenshot - Nos hace una captura de pantalla y nos la envía al Telegram
/power - Si el equipo esta en standby lo enciende y si esta encendido lo pasa a standby
/restart - Reinicia GUI
/reboot - Reinicia todo el sistema
/message - Envía un mensaje a la pantalla. Por ejemplo: /message Vete a dormir, o bien /message Vete a dormir#20. el #20 al final quiere decir que el mensaje permanecerá 20 segundos, si no se pone nada, el mensaje estará 10 segundos
/help - Nos proporciona la lista de mensajes disponibles

Por otra parte. En esta versión también se han añadido notificaciones al móvil en las búsquedas programadas y grabación de series de TV y que os aparecerán al final de la lista de opciones como veis en la imagen anterior.

La de Nueva grabación de Series de TV os mandará un mensaje al móvil cada vez que programe una grabación de alguna serie de TV que tenemos configurada y la otra, que solo saldrá si tenemos configurado en las búsquedas programadas el mostrar notificación cuando empiece un evento, enviará la notificación unos minutos antes de que empiece un evento que coincida con alguna búsqueda programada que tengamos. Ambas configuraciones también se pueden cambiar dentro de las opciones de configuración de Series de TV y de búsquedas programadas respectivamente.
 

evox

OpenSpa Team
Miembro del equipo
Moderador OpenSPA
2 Mar 2009
5.976
4.390
0


MANUAL TO CONFIGURE NOTIFICATIONS WITH TELEGRAM

From version 7.1.002 we have available notifications in telegram. We have made a simple API that does not need many libraries and has been added because besides being able to receive notifications by this system, it allows us to interact also with the receiver with a few simple commands that we will see later.

To start, we need to generate our Telegram bot. To do this, in the Telegram search engine we look for BotFather and access to that bot.
When entering, a screen with the available commands will appear. To create our bot we write the command /newbot.


3-photo_2017-05-13_11-06-54_zpscbyetndb.jpg


As you can see, it asks us for the name of the bot. In this case we have named it "Prueba openspa"

4-photo_2017-05-13_11-07-14_zpskaiw7bx8.jpg


And now we are asked for the username of this bot, which must imperatively end by bot, we have put in this example "Pruebaspabot"

5-photo_2017-05-13_11-07-25_zpsblecdcjv.jpg


As you can see, it tells us that it is already created and gives us an HTTP Token API. This token we should point to know the chat_id and also to put it in the settings of the receiver. As it is very long, as was done with pushetta, we have enabled the option to read it from a file, so my advice is to copy it and paste it into a text file that only contains this token and save it with the token name (in lowercase and without extension).

If you want, you can add a description to the bot with the /setdescription command or an icon with the /setuserpic command. When you put it, at the bottom you will get the list of bots you have created to choose the one you want to make the changes, then you choose the image file, the new text or whatever you are changing, but this is no longer necessary for what we are doing.

For what we are doing we still need chat_id. To get it, we have to use the Telegram search engine again and look for our bot by putting the username of the bot we created previously, in this case Pruebaspabot. We enter it and send any message.

6-photo_2017-05-13_11-07-35_zps0bsartft.jpg

Now we use our prefered web browser and go to the page https://api.telegram.org/bot[TUTOKEN]/getUpdates, replacing [TUTOKEN] by the token that you have put before in the token file and you will get something like this


7-chatid_zpsqcflwcqh.jpg


If you do not get it the first time, send another message again.

Data has been deleted just in case, what you need is the field called "id" that you see here crossed out and that, as you see, comes out twice (it will be the same number). Save that number wich is the chat_id that corresponds to you and you must put it in the settings of the receiver.

Well, we already have it created, now we only need to configure it in the receiver. To begin, we put the token file that we created before and contains the HTTP token of the bot in /usr/lib/enigma2/python/Plugins/Extensions/spaNotifications (it is only necessary to insert it the first time for plugin reading when it is blank in the settings). Then, we go to the notification settings. In this version, because the setting options were becoming very extensive, it has been divided into 3 different screens, so when entering the notifications settings you will get a menu to choose the configuration of the log, the notifications in the screen and mobile notifications. You will enter to last one.


8-notifications1_zpsvgpa5dxg.jpg


9-notifications2_zpsxhwc2ghn.jpg


And by putting the Telegram option on Yes, it reads the file token and will put it in the configuration, so we just have to put the chat_id and configure the options as we want.


10-notifications3_zpssjx9fkon.jpg


From here you will start receiving the notifications by Telegram, but as I said at the beginning, in addition to receiving the notifications, you can send a set of commands to the receiver. The available commands are as follows:

/Info - Returns the receiver model, image version and kernel version
/Status - Indicates whether the receiver is on or off
/Camd status - Tell us if camd is working or not
/Camd restart - Restart the camd
/Screenshot - It makes a screenshot and sends it us to the Telegram
/Power - If the device is in standby it turns on and if it is ON it switches it to standby
/Restart - Restart GUI
/Reboot - Restart the entire system
/Message - Sends a message to the screen. For example: /message Go to sleep, or Go to sleep#20. The #20 at the end means that the message will remain 20 seconds, if nothing is written, the message will remain 10 seconds
/Help - Provides the list of available messages

On the other hand, in this version we also add notifications to the mobile at the scheduled searches and recording of TV series and that will appear at the end of the options list as you can see in the previous picture.

The New TV Series recording will send you a message to the mobile phone each time you program a recording of some TV series that we have set up and the other one, which will only come out if we have configured in the scheduled searches to show notification when an event starts, will send the notification a few minutes before an event that matches a scheduled search. Both settings can also be changed within the TV Series settings and scheduled search settings respectively.
 

apriliars3

Usuario Destacado
Loco por OpenSPA
21 May 2016
497
28
0
44
Increíble el trabajo que hacéis con nuestros decos.

Muchas gracias
 

Cali

Usuario
Amigo OpenSPA
17 Ago 2008
20
1
0
Muy buena idea ...
Gran trabajo :bravo:

Gracias a todo el equipo
 

Crypto

Usuario Activo
Fan de OpenSPA
2 Dic 2015
132
15
0
Vaya pasada, y en especial lo de los comandos por telegram ya es un lujazo.

Enhorabuena a todo el team por el trabajo realizado y seguir innovando.
 

Mellariense

Usuario
Loco por OpenSPA
6 Sep 2009
445
34
0
Cada vez nos sosprendeis con cosas nuevas un gran trbajo soy los mejores
Un saludo
 

boyscout

Usuario Activo
Fan de OpenSPA
28 Dic 2015
190
39
0
41
Muchas gracias morser.
Con ganas de actualizar y probar, excelente trabajo, enhorabuena.
Salu2;)

PD:
He probado el envío de comandos y......voilaaa!!!
Funciona!!, luego cuelgo imagen pues me da error.
 

rusoalicia

Super Mod
Vip OpenSPA
16 Sep 2009
4.953
429
0
Enhorabuena team por tan gran novedad par nuestros decos. Una súper herramienta para el control de nuestros decos.
 

boyscout

Usuario Activo
Fan de OpenSPA
28 Dic 2015
190
39
0
41
Realizada la prueba y todo ha salido a la perfeccion, mis felicitaciones a morser por el trabajo ( te perdono que seas del Athletic :bravo::bravo::bravo:)

Screenshot_20170601_163605.png


Salu2;)
 

chapela69

Usuario
Fan de OpenSPA
7 Abr 2010
282
22
0
buenas tardes; podria valer para 2 decos poniendo el mismo token y id en los 2 decos?
Los 2 decos en sitios diferentes quiero decir
 

morser

OpenSpa Team
Miembro del equipo
21 Mar 2007
7.207
1.307
0
57
buenas tardes; podria valer para 2 decos poniendo el mismo token y id en los 2 decos?
Los 2 decos en sitios diferentes quiero decir

Supongo que si te funcionaria, pero al mandar un comando, lo harian los dos a la vez y al recibir una notificacion, no sabrias de que deco viene de los dos.
 

chapela69

Usuario
Fan de OpenSPA
7 Abr 2010
282
22
0
Ok, probare a ver, uno lo tengo en el trabajo y otro en casa, cuando estoy en casa el del trabajo lo tengo apagado y viceversa.
Todo es provar.
Gracias